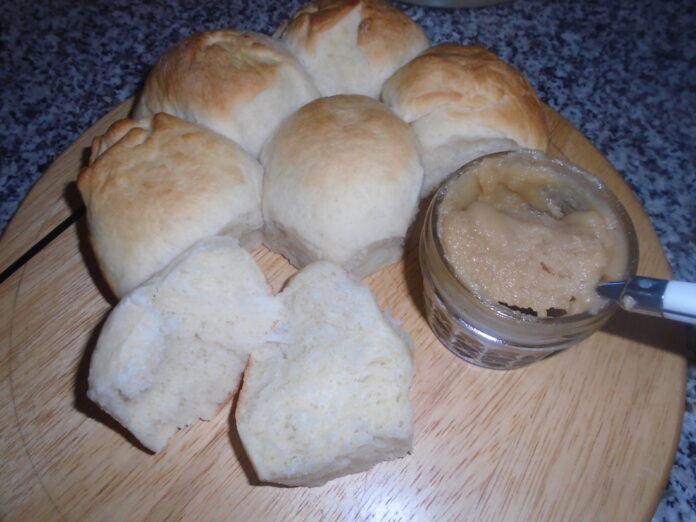
This morning, while up to my elbows in potato yeast dough, a voice calling my name came through my opened screen door. It was my neighbor Heather Boynton. We have this understanding, Heather and I, that ‘mi casa es su casa,’ or, in English: my home is your home. If you need an egg or some milk, or a stalk of celery or two, well here it is with no payback expected.
I’ve been told many times that I’m fortunate to have a neighbor like this. Indeed, I am, but I am sure this friendship has been fast and steady due to one word: ignore. We ignore the little things that might disturb us and concentrate on the good.
Directions on making ghee from butter was the reason for Heather’s visit. She was making fried potatoes and onions for that night’s dinner and needed directions for making ghee as both she and Mike loved the fried potatoes I had sent over one evening which had been fried in my homemade ghee.
Originating in India, ghee has been an Indian staple for a thousand years and now, the rest of the world is catching up, especially those following the Keto diet. Unable to store butter for long periods of time due to its high temperatures, India resorted to clarifying butter (heated until the water evaporates, and the milk solids separate away). The product has a long shelf life.
Milk solids are the parts of milk that remain after the water is removed. If your label on a can or box is listed as having milk solids, this powdery substance has been added to the product.
Today, ghee is widely available, both online and in stores, albeit quite expensive. In stores and online, prices range from $1.12 per oz. to $3 per oz. and over.
I use ghee to replace butter whenever I want a deep browned and nutty buttery flavor, i.e., in vegetables, scrambled eggs, mashed potatoes, on waffles/pancakes and even popcorn. Trust me, you will be happy to have ghee as part of your pantry.
I’m sending some of these potato yeast rolls I was in the middle of baking for Heather’s dinner tonight, rolls that are simply delicious slathered in my homemade ghee.
To make your own the same way I do at home here’s how to achieve pure golden nutty ghee from butter.
Ghee from Butter
- Heat one pound of butter in a heavy-bottomed pan over low heat without stirring. Be patient. Soon the butter will begin to simmer and make crackling sounds.
- After 20 minutes, the crackling will stop and there will be a thin layer of fat on top with a heavier layer of solids on the bottom of the pan. Make sure this does not burn.
- The butter should be a clear golden color on top with very few air bubbles on the surface. At this point, the ghee is done.
- Turn off the heat and let sit for one hour. If you want very clear ghee for cake baking purposes, strain it into a clean, dry, airtight container.
- Store away from light for up to three months or in the refrigerator for one year.
I make one batch of ghee for cake-baking and one batch, unstrained, as I love the brown bits of sediment at the bottom for frying purposes.
Tip: I usually pour one batch of ghee into plastic ice cube trays. Once hardened, I pop them out into a Ziplock bag for easy access.
Potato Yeast Rolls
Read recipe before beginning.
1 ¼ cup hot water
¼ cup whole milk
1/3 cup gran. sugar
¼ cup Rapid Rise yeast
In a bowl, mix ingredients together and sprinkle yeast on top. Let sit 5 minutes to proof.
Add to yeast mixture:
- ½ cup potato flakes
- 4 ¼ cup bread flour
- 1 ½ tsp. salt
- 6 Tbsp. very soft butter
Mix well for 5 minutes in your stand mixer with dough hook.
Cover bowl with Saranwrap and a towel and set aside in warm place for 90 minutes or until dough is doubled in size.
Dump dough out onto a floured breadboard and roll dough into a 12 in. roll.
With your bench scraper, or floured knife, cut dough into 15 equal pieces.
Roll ea. piece into a tight ball and place in a greased 9”x12” baking pan.
Cover with a towel and let rise until just doubled. Do not overproof dough.
Bake in a preheated 350-degree oven for 25 min.
Note: Over-proofing dough will cause the top of the rolls or any bread to deflate a little in the oven. Once dough has almost doubled, test by making an indent in top with your finger. If the dough pops up quickly, give it a little more time. If dough springs back up slowly and leaves a small dent, its ready for baking, leaving room for dough to rise in the oven.
Colly Gruczelak, a Ben Lomond resident, loves people and loves to cook. Contact her at cz****@*****st.net.


